Crochet this fabulous chunky Herringbone Stitch Bag with all the very basic stitches, is one of the most unique and fabulous stitch among all stitches. The bag is super useful and stylish accessory every woman should have in a closet, So, if you are looking for a beautiful crochet handbag pattern that will perfectly match with any of your outfit, this is the one your should try even if you just started learning single crochet and half double! The Herringbone Single Crochet is definitely one of my favorite crochet technique. It creates such a unique texture that almost looks similar to the herringbone knit stitch. The best part is that it is just a slight variation of the single crochet. Once you see this stitch being crocheted it’s pretty easy follow as it’s a 2 row repeat and uses only single crochets. and you can easily use this stitch to create a wide variety of patterns! Adel handmade shares this very detailed video tutorial with English subtitle that you can follow easily, even for beginners.
You may love: Pleats Wrinkle Bag Free Crochet Pattern + Video
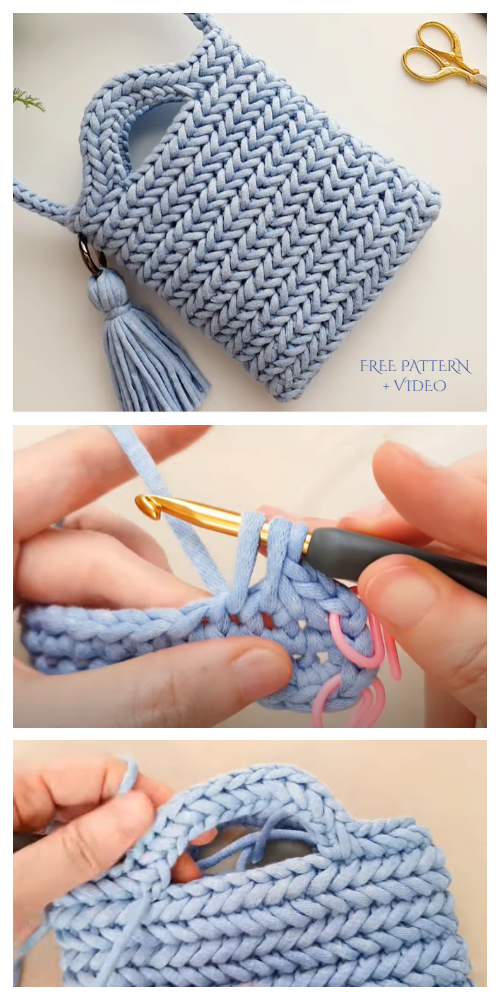
Written Pattern(Efforts by fabartdiy):
Use BRIDGE YARN*2 ball, crochet hook 5.5mm, 3cm diameter ring
Ch 18 (as the width of the bag, you can change to any size you want)
R1: Ch1, sc*18 from in the 2nd st, add 2 sc in last ch, sc*18, add 2 sc in last ch, slip to join (40 sts)
Herringbone
R1: Ch 1, SC in 1st st, HSC in each st until end, join
R2: Ch1, working into the back bumps of the ch, SC in the 2nd ch from the hook, HSC in each ch until end, join
Repeat R1-2 for the desired length, keep the yarn for handle
Handle
Yarn into 4th of the row, ch 13, skip 10 sts, sc into 14th ch with 4 sts remaining
Handle Herringbone
R1: Ch 1, SC in 1st st, HSC in each st until end, join
R2: Ch1, working into the back bumps of the ch, SC in the 2nd ch from the hook, HSC in each ch until end, join
I-CORD strap: 95cm
R1: Ch 3. Insert hook into 2nd chain, pull up a loop. Insert hook into 3rd chain, pull up a loop. (3 loops on hook)
R2 – desired length: Remove 2 loops from hook, being careful not to lose them. With remaining loop, yarn over and ch 1. Insert hook into next (empty) loop, yarn over and pull up a loop. Insert hook into last (empty) loop, yarn over and pull up a loop(3 loops on hook).
Continue creating rows in this manner until the cord is as long as you’d like.
To end the cord: yarn over and pull through all three loops on hook. Fasten off and weave in all ends.


